It's time to print your photos!
If you’ve had a photoshoot with me or another photographer and have invested in the digital files, but not yet printed any photos it’s time to change that. Getting photos printed is the most important part, otherwise your kids won’t see them!!
Incorporating family photos into the home environment offers a range of emotional, social, and developmental benefits for children, contributing to their overall well-being.
I have put together this guide to help you decide how to display your photos in your house, and other therapeutic ways to incorporate photos into daily life and play.
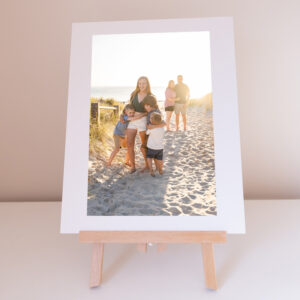
Large prints (Wall art)
I recommend having a large print hanging in a prominent location in your house. It needs to be somewhere your kids will see it every day. By having photos of your kids proudly on display in your home this will help build your children’s self-esteem as they will see this wall art and know they are valued. When people come to your house they will comment on the photos and this will further increase your children’s self-esteem and pride.


I can help you with this process and have the photos professionally printed so you can all enjoy them for many decades. Or if you’re wanting to organise your own printing and do it yourself just follow the steps below:
- Decide on a location within your home to put a large print- above the couch or near the dining table are popular choices. If the location has windows nearby it may be better suited to have a canvas or wooden print to avoid reflections on the glass. If you’re feeling adventurous you could do a photo wall where you print several photos. If doing this I recommend no single photo is smaller than 8×10” otherwise they look too small on the wall.
- Find a suitable frame (kmart, big w, spotlight and officeworks all have large selections at budget friendly prices). I recommend large prints are at least 20×30” or A1 size. Alternatively have a canvas or wooden print done to negate the need to get a frame.
- Have the photo printed to the correct size for the frame. I recommend going to Atkins Lab in Kent Town for very high quality prints. Otherwise Harvey Norman do an okay job for a more cost effective option. There are also a lot of online print labs where you can order online and have the prints delivered to you.
- Hang it up- do NOT skip this step!!! Otherwise your kids wont see them! I love 3M Picture Hanging Strips as these are super easy to “Velcro” lighter weight pictures to the wall. Traditional picture hanging hooks also work great. For large heavy pictures I always use a Wallmate with a screw. If doing multiple prints in a series on the wall I use a spirit level as a spacer and to ensure they are all level.
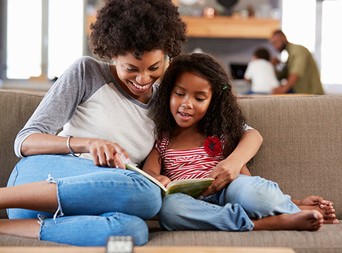
Albums / photobooks
If doing an album or photobook the most important thing is to let your child read/look at it regularly. There is no point putting it away in a cupboard and them never seeing it.
I suggest doing these as a lower cost item so they are easily replaced if they get damaged.
I recommend keeping it simple and having one photo per page but including an age-appropriate positive statement on each page. Some examples include:
- Bob is loved.
- Mum loves Bob.
- Mum gives Bob hugs to show him she loves him.
- Bob loves playing with his brother.
- Bob gives the best hugs.
- “Bob is” or “You are” valued/strong/capable/resilient/kind.
You could also include statements about the relationships and actions between each family member. Eg:
- Mum/Dad/Sibling loves that you are kind/adventurous/funny.
- Mum/Dad/Sibling hugs/kisses/makes you laugh because they love you.
- Mum/Dad/Sibling show that they love me by hugging me/making me laugh/giving me a shoulder ride etc.

Smaller prints
Have your child pick their favourite image and get this printed for their room. Ikea’s frames are acrylic instead of glass so they are more sturdy and won’t shatter into a million pieces. You can do a larger print for their wall or a smaller print in a stand up frame for their bedside table.
Therapeutic uses/play
Ask treating therapists if there are ways the photos can be incorporated into their therapy sessions.
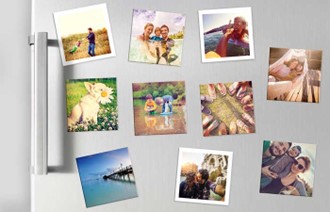
Photo magnets are one of my favourite ways to use photos in therapy/play. These are almost always on sale for $10 for 10 from
Photobookshop.com.au and include postage to your home.
These are much more robust than a standard print and the fact that they are magnetic makes them easy to use on a fridge/dishwasher/magnetic whiteboard which helps build fine and gross motor skills.
Just a few uses include:
– Having doubles of each image and placing them all face down on a table for a game of memory.
– Have the child sort the photos into different groups- eg all photos with 1/2/3/4 people. Or all the photos with someone wearing white. You can also select two photos that have something in common and ask your child to identify what is similar about both photos. This helps build categorisation and organisation skills.
– Have the child pick all of the photos that have one member of the family. Eg “can you find all the photos of mum”. You can build on this to
include two family members eg “can you find all the photos with mum and your sister”. Again this builds categorisation and organisation skills.
– Look at each photo individually and chat about what is going on in the photo. Ask the child to name the emotion on each person’s face, what they think this means, why the person feels that way, what this implies etc. This helps work on emotional and social skills. Eg:
Parent: “do you think Dad is happy, sad or angry in this photo?”
Child: “happy”
Parent “why do you think that?”
Child “he is smiling”
Parent “why do you think he is smiling?”
Child “because I am giving him a hug”
Parent “yes Dad is happy and smiling because he loves you. When you give
him hugs it makes him happy. You give great hugs!”.
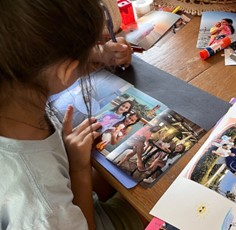
10c prints
Go to Kmart or Officeworks and print a bunch of photos off. Use these for craft activities to work on fine motor skills. Cut them up and stick them in a scrap book, or make a collage. Get your child to stick one photo per page and write a sentence below each photo to encourage storytelling. Get your child to use a hole punch and thread them on string to display as bunting in your child’s room. Or use craft pegs and have them peg photos to a string to display their favourite photos.

Let me know how you get on!
I would love to see what you end up doing with your photos and please let me know if there are any activities your child particularly enjoyed. Please also let me know if you/your therapists came up with something great that I should add to this list!
I’m here to help
Let me know if you’re having difficulties with anything or if you can’t find the time to get things printed you are welcome to order professional prints through me at any time. Feel free to contact me on 0422 896 108 or [email protected].
Enjoy!
Tammy x